
Aprilaire 400 Installation Manual: A Comprehensive Guide
Welcome to the Aprilaire 400 installation manual, your step-by-step guide to setting up a whole-home humidification system. This manual ensures safety, accuracy, and optimal performance for your unit. Follow the instructions carefully to avoid errors and enjoy the benefits of balanced indoor humidity.
The Aprilaire 400 is a whole-home humidifier designed to provide consistent moisture. It works with your HVAC system to maintain optimal humidity levels, enhancing indoor air quality and comfort.
Overview of the Aprilaire 400 Model
The Aprilaire 400 is a whole-home humidifier designed to balance indoor humidity levels seamlessly. It integrates with your HVAC system, automatically adjusting moisture based on the home’s humidity needs. Known for its energy-efficient design and low maintenance, it ensures consistent air quality and comfort. Its compact size and robust performance make it ideal for various home sizes, providing reliable humidity control and enhancing overall wellness by preventing dry air issues.
Importance of Proper Installation
Proper installation of the Aprilaire 400 is crucial for ensuring safety, efficiency, and optimal performance. Incorrect installation can lead to issues like mold growth, water damage, or ineffective humidity control. Following the manual ensures the humidifier operates safely and efficiently, preventing potential hazards such as electrical shock or system malfunctions. Proper setup also extends the lifespan of the unit and maintains indoor air quality for a healthier living environment.
Key Features and Benefits
The Aprilaire 400 offers whole-home humidification, providing consistent moisture levels throughout your house. Its automatic operation ensures optimal humidity without constant adjustments. The unit is designed for quiet performance and low water usage, making it energy-efficient. With features like built-in drainage and compatibility with most HVAC systems, the Aprilaire 400 enhances indoor comfort while protecting your home from dry air damage and promoting better health.
Pre-Installation Checklist
Disconnect power to the furnace, gather tools, and prepare the installation area. Ensure all materials are available and the location is safe and accessible for setup.
Safety Precautions and Preparation
Always disconnect power to the furnace before starting installation to prevent electrical shock. Avoid installing in areas where freezing may occur, as this can cause condensation damage or mold. Wear protective gear, including gloves and safety glasses, when handling sharp edges or materials. Ensure the installation area is clear and well-lit to prevent accidents. Properly prepare the ductwork and furnace to ensure a safe and secure setup for the humidifier.
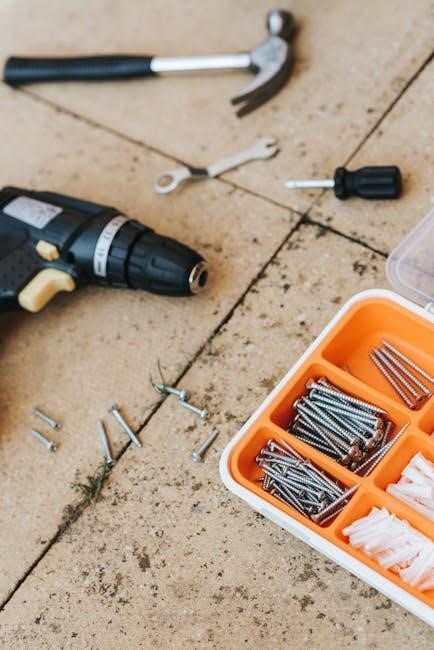
Tools and Materials Required
To install the Aprilaire 400, you’ll need a screwdriver, pliers, wire connectors, and a drill. Additional materials include ductwork components, water tubing, and electrical wiring. Ensure you have a voltage tester for safety checks. A level and measuring tape will help with accurate placement. Gather all parts from the installation kit, including the humidifier unit, mounting hardware, and control wires. Have a bucket or tray ready for water drainage during setup.
Choosing the Right Location
Selecting the right location for your Aprilaire 400 is crucial for optimal performance. Ensure the humidifier is installed near your furnace and ductwork for seamless integration. Choose a spot with consistent temperatures and avoid areas prone to freezing or excessive moisture. The unit should be easily accessible for maintenance and adjustments. Use the provided installation template to mark the correct placement on the ductwork. Proper location ensures efficient humidity distribution and prevents potential damage or mold growth.
Installation Process
The Aprilaire 400 installation involves preparing the furnace, installing the humidifier unit, and connecting it to your HVAC system. Follow the step-by-step guide for a safe and efficient setup.
Step 1: Prepare the Furnace and Ductwork
Begin by disconnecting power to the furnace for safety. Clean the furnace and surrounding area to ensure a dust-free environment. Inspect the ductwork for blockages or damage and repair as needed. Locate the humidifier installation point near the furnace, ensuring proper clearance. Mark the ductwork for the humidifier opening, following the manufacturer’s guidelines. This step ensures a smooth and safe installation process for the Aprilaire 400 humidifier.
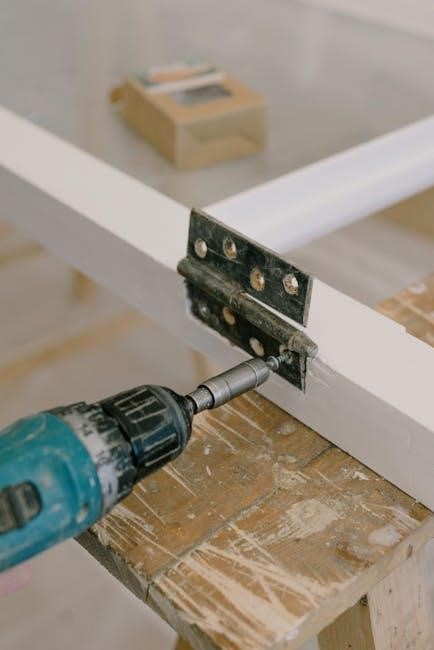
Step 2: Install the Humidifier Unit
Place the Aprilaire 400 unit near the furnace, ensuring it is level and securely fastened. Mount the humidifier on a sturdy surface to prevent vibration. Align the unit’s duct opening with the prepared furnace ductwork, following the manufacturer’s alignment specifications. Connect the bypass duct to the humidifier, ensuring a tight seal. Double-check all fasteners and connections for stability and proper fit before proceeding to the next step.
Step 3: Connect the Humidifier to the HVAC System
Connect the humidifier’s bypass duct to the HVAC system’s supply plenum, ensuring a tight seal. Attach the humidistat to the furnace’s control board, following the wiring diagram. Secure all connections firmly to prevent air leaks. Verify that the humidifier operates in sync with the HVAC system by testing the electrical and mechanical links. Proper connections ensure efficient humidity distribution and optimal system performance. Double-check for any gaps or loose fittings before finalizing this step.
Electrical Connections and Wiring
Disconnect power to the furnace before starting electrical connections. Use a circuit breaker or switch to ensure safety. Connect the humidistat and wiring according to the manual’s diagram, ensuring all connections are secure and meet system requirements. Always follow safety guidelines to avoid electrical hazards.
Disconnecting Power and Connecting Wires
Before starting, disconnect the furnace’s power supply at the circuit breaker to ensure safety. Verify the power is off using a voltage tester. Locate the wiring terminals on the Aprilaire 400 and furnace. Connect the humidistat wires according to the manual’s wiring diagram, ensuring secure connections. Use needle-nose pliers for tight spaces and wire strippers for clean connections. Double-check all wire labels and connections for accuracy to avoid electrical issues. Always refer to the manual if unsure.
Setting Up the Humidistat and Controls
Mount the humidistat on a wall near the thermostat for easy access. Set the desired humidity level between 35-45% for optimal comfort. Use the control knob to adjust settings and ensure the humidistat is wired correctly to the HVAC system. Test the system by running the furnace fan to confirm the humidifier activates when needed. Refer to the manual for specific wiring diagrams and calibration instructions to ensure accurate humidity control.

Water Supply Setup and Drainage
Connect the water supply line securely to avoid leaks. Ensure proper drainage to prevent water damage or mold. Use a condensate pump if necessary for efficient drainage.
Connecting the Water Line Safely
Turn off the main water supply before connecting the water line to the Aprilaire 400. Use a saddle valve or dedicated water line to ensure a secure connection. Install a water filter upstream to prevent sediment buildup. Connect the line firmly to avoid leaks, and test the connection by slowly turning on the water supply. Inspect for any signs of moisture or dripping after testing.
Ensuring Proper Drainage
Proper drainage is crucial for the Aprilaire 400 to function effectively. Route the drain tubing to a nearby floor drain or condensate pump, ensuring no kinks or bends that could block water flow. Secure the tubing tightly to prevent disconnection. Test the system by running water through it to check for leaks. Proper drainage prevents water damage and mold growth, ensuring safe and efficient operation of your humidifier.
Post-Installation Testing
After installation, activate the Aprilaire 400 and monitor its operation. Check humidity levels, water flow, and system responsiveness. Ensure all components function smoothly and quietly.
Testing the Humidifier Operation
Once installed, turn on the Aprilaire 400 and check its operation. Verify that the humidistat accurately detects humidity levels and activates the unit appropriately. Ensure water flows correctly and mist is evenly distributed. Test the system under different settings to confirm consistent performance and quiet operation. Address any issues promptly to maintain efficiency and prevent future malfunctions.
Checking for Leaks and Proper Functionality
After installation, inspect all connections and water lines for leaks. Ensure the humidifier operates smoothly and evenly distributes mist. Verify that the drainage system functions correctly to prevent water buildup. Test the unit under various settings to confirm consistent performance. Address any leaks or malfunctions promptly to maintain efficiency and prevent damage. Proper functionality ensures optimal humidity levels and system longevity.
Maintenance Tips
Regularly clean the humidifier and replace filters to ensure efficiency. Check water panels and drainage systems for blockages. Seasonal checks help maintain optimal performance and prevent issues.
Regular Cleaning and Filter Replacement
Regular cleaning of the Aprilaire 400 is essential to prevent mold and mineral buildup. Replace the water panel annually or as recommended. Clean the humidifier drain regularly to ensure proper flow. Inspect and replace filters every 1-3 months, depending on usage. Always use distilled water to minimize mineral deposits. Refer to the manual for specific cleaning schedules and procedures to maintain efficiency and reliability. Proper maintenance ensures optimal performance and extends the unit’s lifespan.
Seasonal Maintenance Recommendations
For seasonal maintenance, disconnect power and inspect the Aprilaire 400 for damage. Clean the humidifier thoroughly, especially areas prone to mold. Replace any worn-out parts to ensure optimal performance. Drain the water panel to prevent mineral buildup during off-seasons. Check the drain line for blockages and ensure proper water flow. Prepare the unit for the next heating season by verifying humidistat settings. Regular seasonal upkeep extends the unit’s lifespan and maintains efficiency.
Troubleshooting Common Issues
Troubleshoot common issues like no power, water leaks, or low humidity. Check electrical connections, inspect for blockages, and ensure the humidistat is set correctly. Reset the unit if necessary.
Identifying and Resolving Common Problems
Identify common issues such as low humidity output, water leaks, or erratic humidistat behavior. Check for blocked water filters or kinked drain hoses. Ensure the humidistat is set correctly and the damper is fully open. If issues persist, reset the unit or consult a professional for assistance. Regular maintenance can prevent many of these problems, ensuring efficient operation and optimal indoor air quality. Always refer to the manual for specific troubleshooting steps to resolve issues effectively.
When to Call a Professional
If you encounter complex issues beyond basic troubleshooting, such as electrical malfunctions or extensive ductwork modifications, consult a licensed HVAC technician. Professionals can handle advanced diagnostics, ensure compliance with safety standards, and perform repairs requiring specialized tools or expertise. Don’t risk safety or system damage—seek expert help when uncertain or when issues persist after self-troubleshooting. A professional ensures your Aprilaire 400 operates safely and efficiently.
Congratulations! Your Aprilaire 400 is now correctly installed and safely integrated into your home system. Proper setup ensures optimal humidity control and energy efficiency for years to come.
Final Checks and Ensuring Optimal Performance
After completing the installation, perform a thorough inspection to ensure all connections are secure and functioning properly. Verify the humidistat settings align with your desired humidity levels. Test the water supply and drainage systems for leaks or blockages. Finally, run the humidifier through a full cycle to confirm smooth operation. Regularly inspect and maintain the unit to ensure long-term efficiency and reliability, providing consistent indoor air quality for your home.
Importance of Following the Manual
Adhering to the Aprilaire 400 installation manual ensures safety, prevents errors, and guarantees optimal performance. Proper installation avoids electrical hazards and water damage. Following manufacturer guidelines also preserves your warranty and ensures compliance with local regulations. Deviating from instructions can lead to system malfunctions or inefficient operation. By carefully following each step, you can enjoy reliable humidity control and maintain a healthy indoor environment for years to come.